PROJECTS
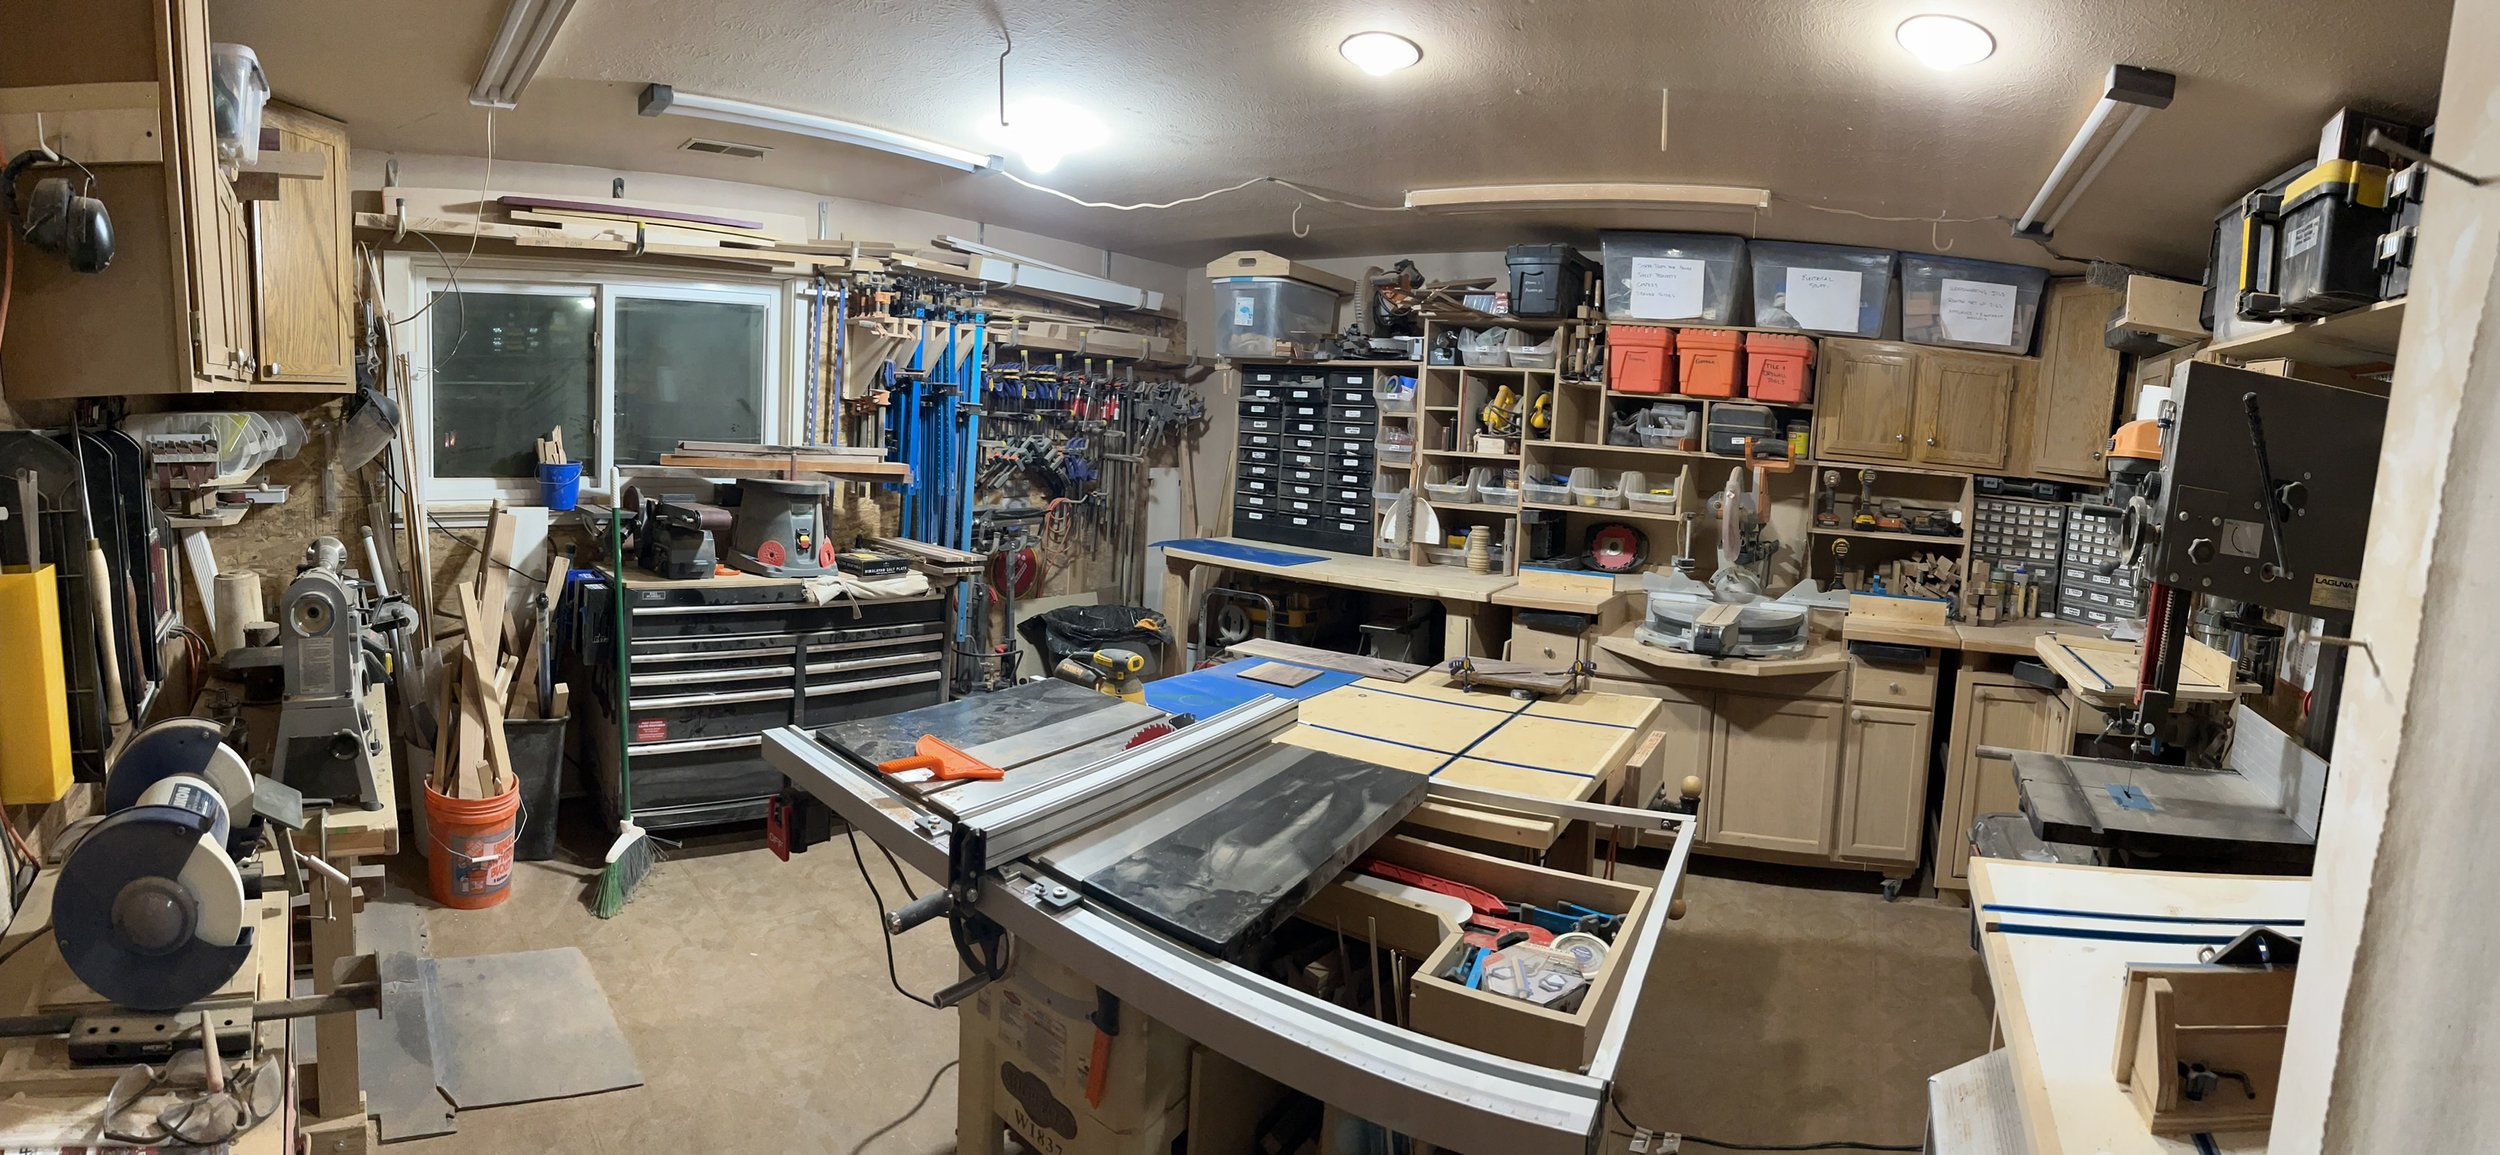
This was my first workspace (not pictured is a small Craftsman table saw and a drill press). It was built in our undersized townhouse garage. I’ve made some significant improvements as I’ve increased my skills.
My current shop
Early Projects
Barstools
Construction grade pine, Polyshades espresso Stain
These barstools were my very first ‘adult’ wood working project… at the time, I really didn’t know what I was doing. The reason I chose this is we needed a custom height barstool for the counter top and no one sold a barstool that worked - either they were too tall or too short.
While I won’t bore you with all the ins and outs of this project, I can tell you I learned A TON as a result!! Most of these were from errors I made.
Construction grade lumber is not always the same size (why planers were invented)
There’s a reason why having 2 fixation screws is the norm for bracing pieces (I used only 1). Notice the angle brackets that had to be added within a few weeks of completing the piece (why mortise and tenon is a great design and has become the basis for most of the furniture I now make)
Contoured surfaces, like a seat, take forever if you’re just creating them using 60 grit sandpaper and an orbital sander (why routers and angle grinders were invented)
When you have all 4 sides of a piece all contacting the ground, making the barstool not wobble is very difficult (why they invented rubber feet).
Angles suck to figure out after you’ve put things together. Plan first, include angles as part of the initial assembly
Bed and Nightstands
I decided to just go all Tin Cup for my second project after making the barstools instead of just doing small incremental projects.
So I decided to make a bed and nightstands… you know, just something super simple (eyes rolling here) This one was designed and built pretty much by trial and error. I didn’t learn from my above mistake that while construction grade lumber is cheap, it isn’t straight or uniform thickness… but I did buy a planer for this project so while it was a pain in the butt working with the lumber I used, after a good amount of ‘fixing’ all the issues with it, the finished product turned out straight and true.
Funny story… I designed this bed to be quite tall (almost 36” with the mattress) in order to discourage our dogs from sleeping up in the bed. This was at a time when we had just gotten our first dogs (I hadn’t grown up with any pets, other than some goldfish and a little sister we thought of as a pet) and I was adamant they didn’t sleep with us. Well, as most pet lovers can attest to, within a few years, I completely caved. One of the reasons for this was they absolutely LOVED being on the bed… turns out the taller bed gave them a much better view out the window to be able to see what was going on. Jumping on and off the bed was not a problem when they were young… However as they go older, it was not desired… so it actually drove me to build our second bed… more on that in a bit.
So my favorite part of all this is the nightstands. I have always hated trying to find the pull chain on the lamps in the dark. So I actually designed in an outlet into the nightstand, with one of the plugs constant power and one of the plugs switched power (switch on the top of the nightstand). I made left and right nightstands so the switch would be on the inside. I included this on my next set of nightstands (so they’d match the new bed).
When I built the new bed, this bed and nightstands was actually the first thing I ever sold that I made.
Credenza / Entertainment Unit
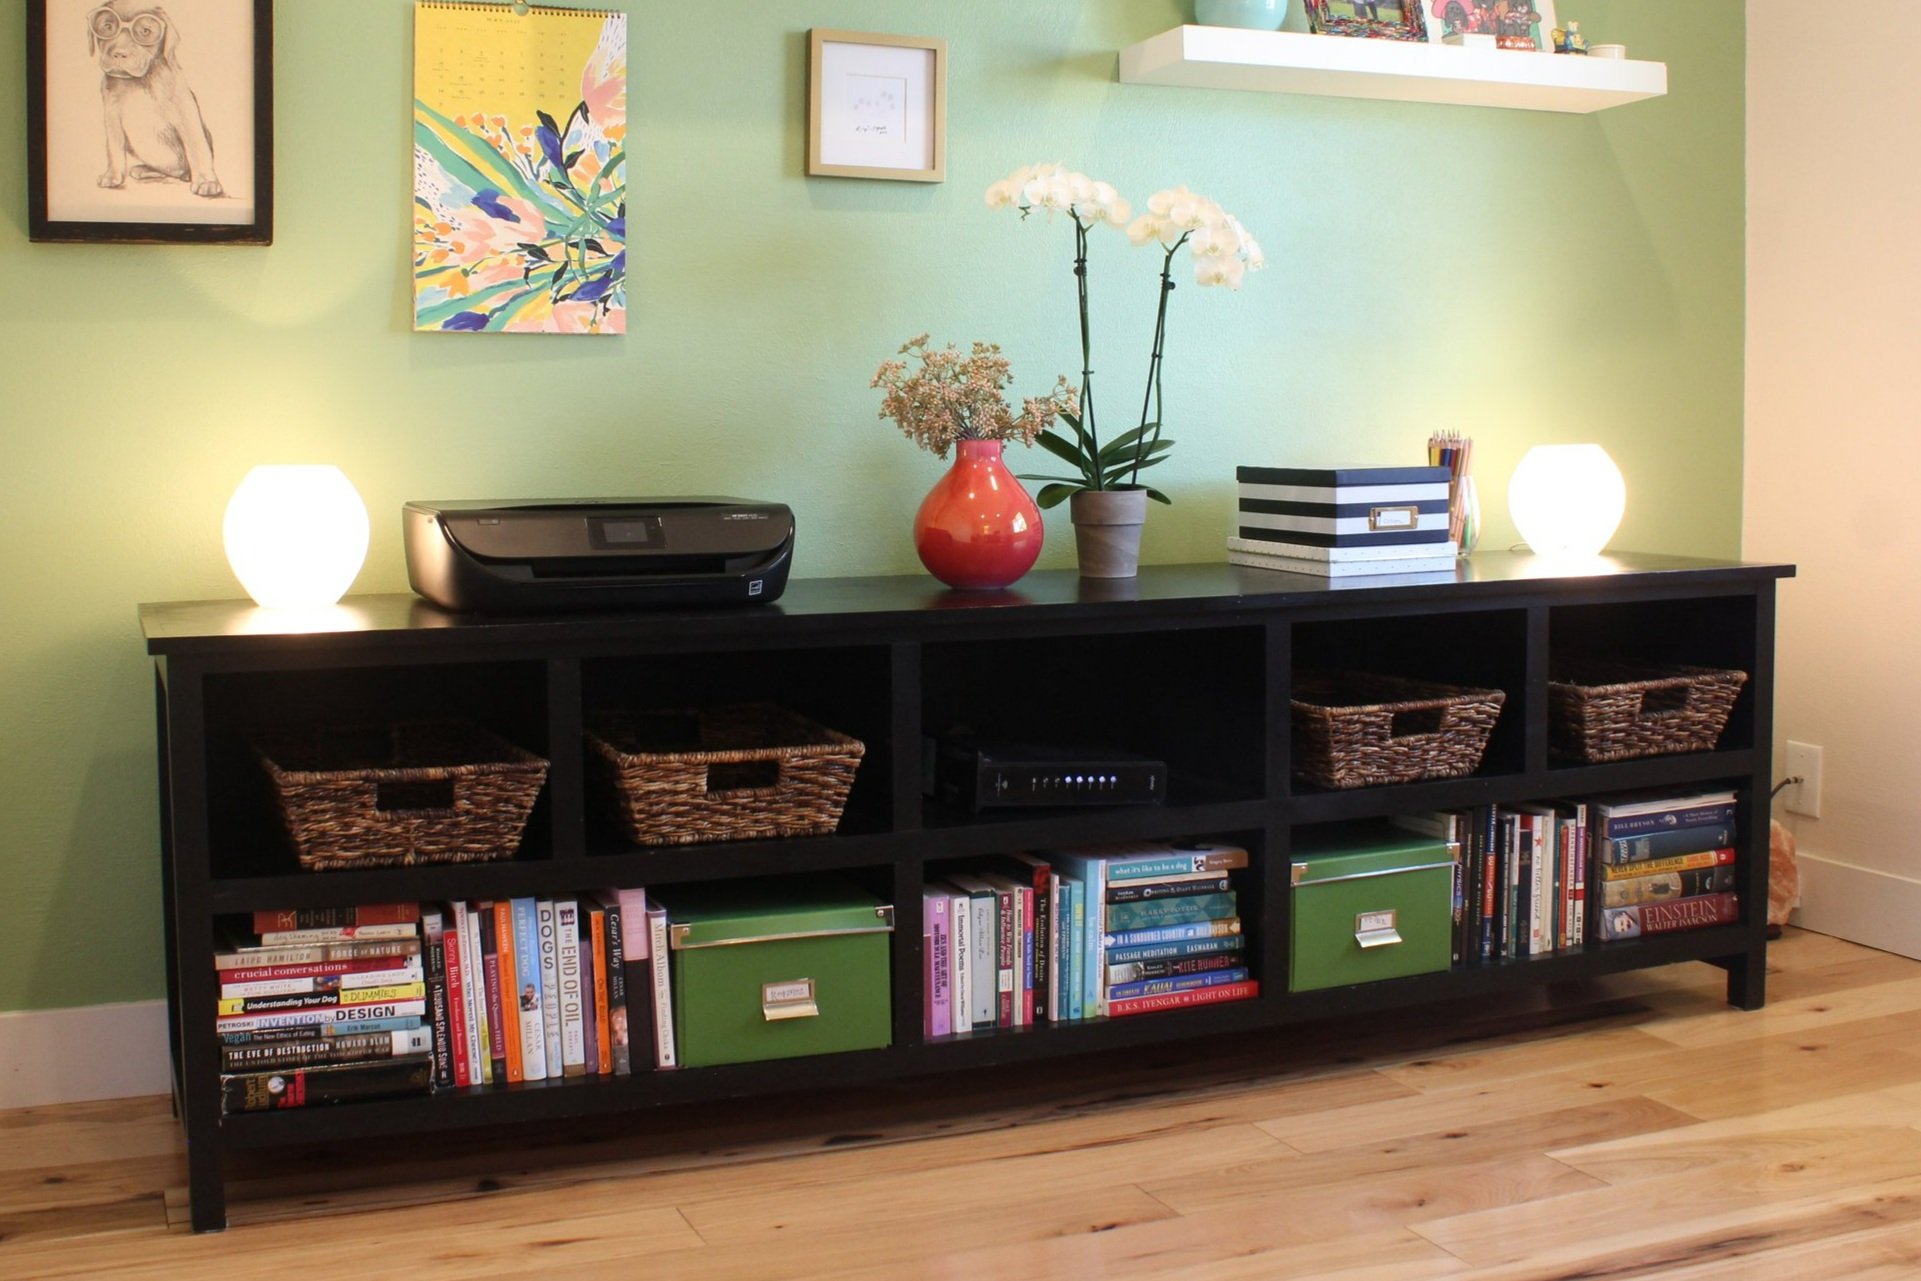
Cabinet grade plywood, Pine, Polyshades black stain
This credenza was originally built as an entertainment unit for our family room. My wife found the baskets first and I designed the unit around them. It’s a pretty big unit - almost 8 feet long - but really wasn’t very heavy, as I used a lot of 1/4” plywood for all the intermediary shelves reinforced with 1/2” solid wood spines. The top was my first time using cabinet grade plywood and edging with solid wood. As we’ve moved to a wall mounted tv, this unit was re-purposed as a credenza in our office until recently when I built a new one designed a little better for the space (and sold this one on Craigslist).
The Polyshades stain is actually one of my favorites when it comes to durability. I have been quite shocked how much it resists most damage that comes from putting things on it and moving things around on it. Only downside is that it’s kind of a pain to put on without brush strokes and not allowing runs on perpendicular surfaces. I found that you truly need to do 3 coats and only with 3 coats do you get a real nice surface look.
Dining Room Hutch
Cabinet grade plywood, solid pine, Polyshades black stain
I built this just after the entertainment unit above (we were really into black furniture at the time). It consists of a plywood top (just like the entertainment unit), side panels, and veneered plywood drawer fronts. But I opted for solid pine throughout for the frame and doors.
The fun part on this one was deciding on the knobs. We picked out a few different styles and then let our friends decide through surveying them on what style they like best and the location of the knobs. To be honest, the knobs that were chosen were my LEAST favorite ones at the time… however over the last 7 years, they have become one of my favorite knobs of anything we have in the house cause they’re so eclectic and just work so well.
Multi-Tier Shelving Unit
Cabinet grade plywood, solid pine, Polyshades black stain
Like the hutch above, we were really into black furniture at the time. It was inspired by a similar design at Crate and Barrel, however I made this one much taller and wider. Because it was going to be so large, I designed it to be as light as possible, so utilized a carcass design (all outer edges were solid wood) with ribs for the shelves and then faced with 1/4” birch plywood.
Overall, it probably weighs only 100 lbs, which is pretty incredible given its overall size. It has since been painted to a green/grey color (and I got to fix some of my entry level wood worker mistakes when we made the color change).
Carving - Candle in a Cross
Basswood, custom oil stain
Maybe 6 or 7 years ago, my mom asked me what I wanted for Christmas (I guess I’m hard to buy for…). I gave her a few different tools and jigs I was interested in getting for myself to which she responded mostly joking, ‘It’s not fun to shop for you!’. So in that moment, I asked her and said I’d love to learn how to carve, so asked her if she would get me a gift card to Woodcraft so I could take a carving class. She was happy to do this, as her father (my grandpa) was a big carver and it was something I had always wanted to learn how to do. He passed down his carving chisels to me when he couldn’t carve anymore and they just sat in a cabinet, dull and in pretty bad shape.
I took a class from an extremely talented local carver, Charlie Milliser, and found that I really enjoy carving. Now to be fair, I’m not very good, but I enjoy it all the same and it’s a quiet thing I can do at night if I can’t fall asleep (which my wife really appreciates). The best part of this was I brought the chisels my grandpa gave me and got them nice and cleaned up and sharpened and I use them to this day.
Fast forward a few months… and while I was visiting my grandma and grandpa, my grandma kept telling us how elated she was that she found this really cool scroll saw cross at a flea market and she thought it was just so beautiful. I decided to take a quick snap shot of it (see pic) and would try to carve her something similar. I chose to put a bible verse on it using a dremel tool and it now hangs proudly over her bed. I think if I had to do it again, I would change the stain I used, as its just too heavy. But overall, I was happy with the project.
I have since made that same Grandma an aspen ‘Honor Breit’ plaque (her last name is Breit), as this was the mantra my parents made us say growing up. The aspen came from some logs I found on the side of the road that I milled into carving stock. I’ve also made a ‘Rydin’ coat of arms as a Christmas gift for my own Mom (each image represents each one of my family members), a (requested) coat rack for my brother and his family, and I try to personalize various gifts I make with initials or designs.
Trucks
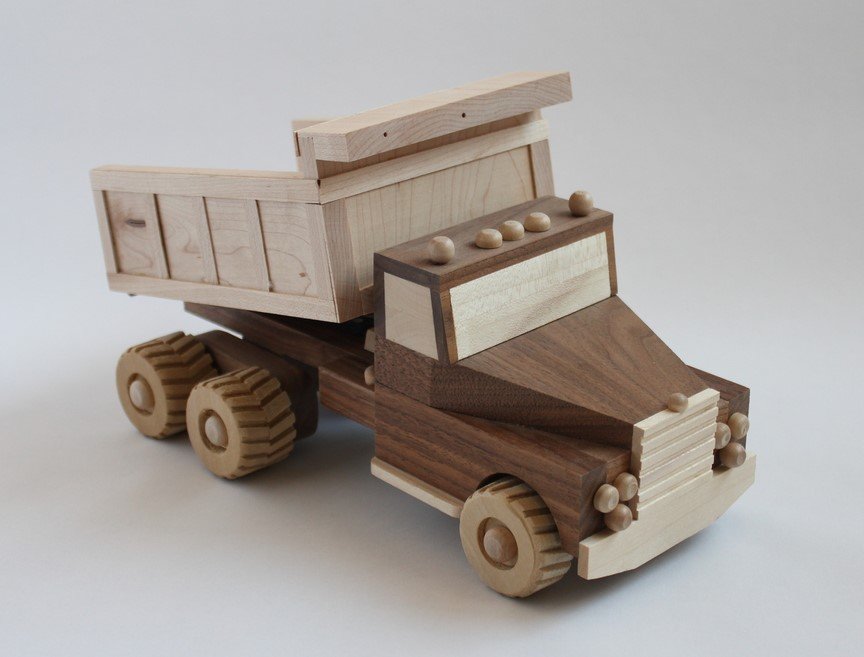
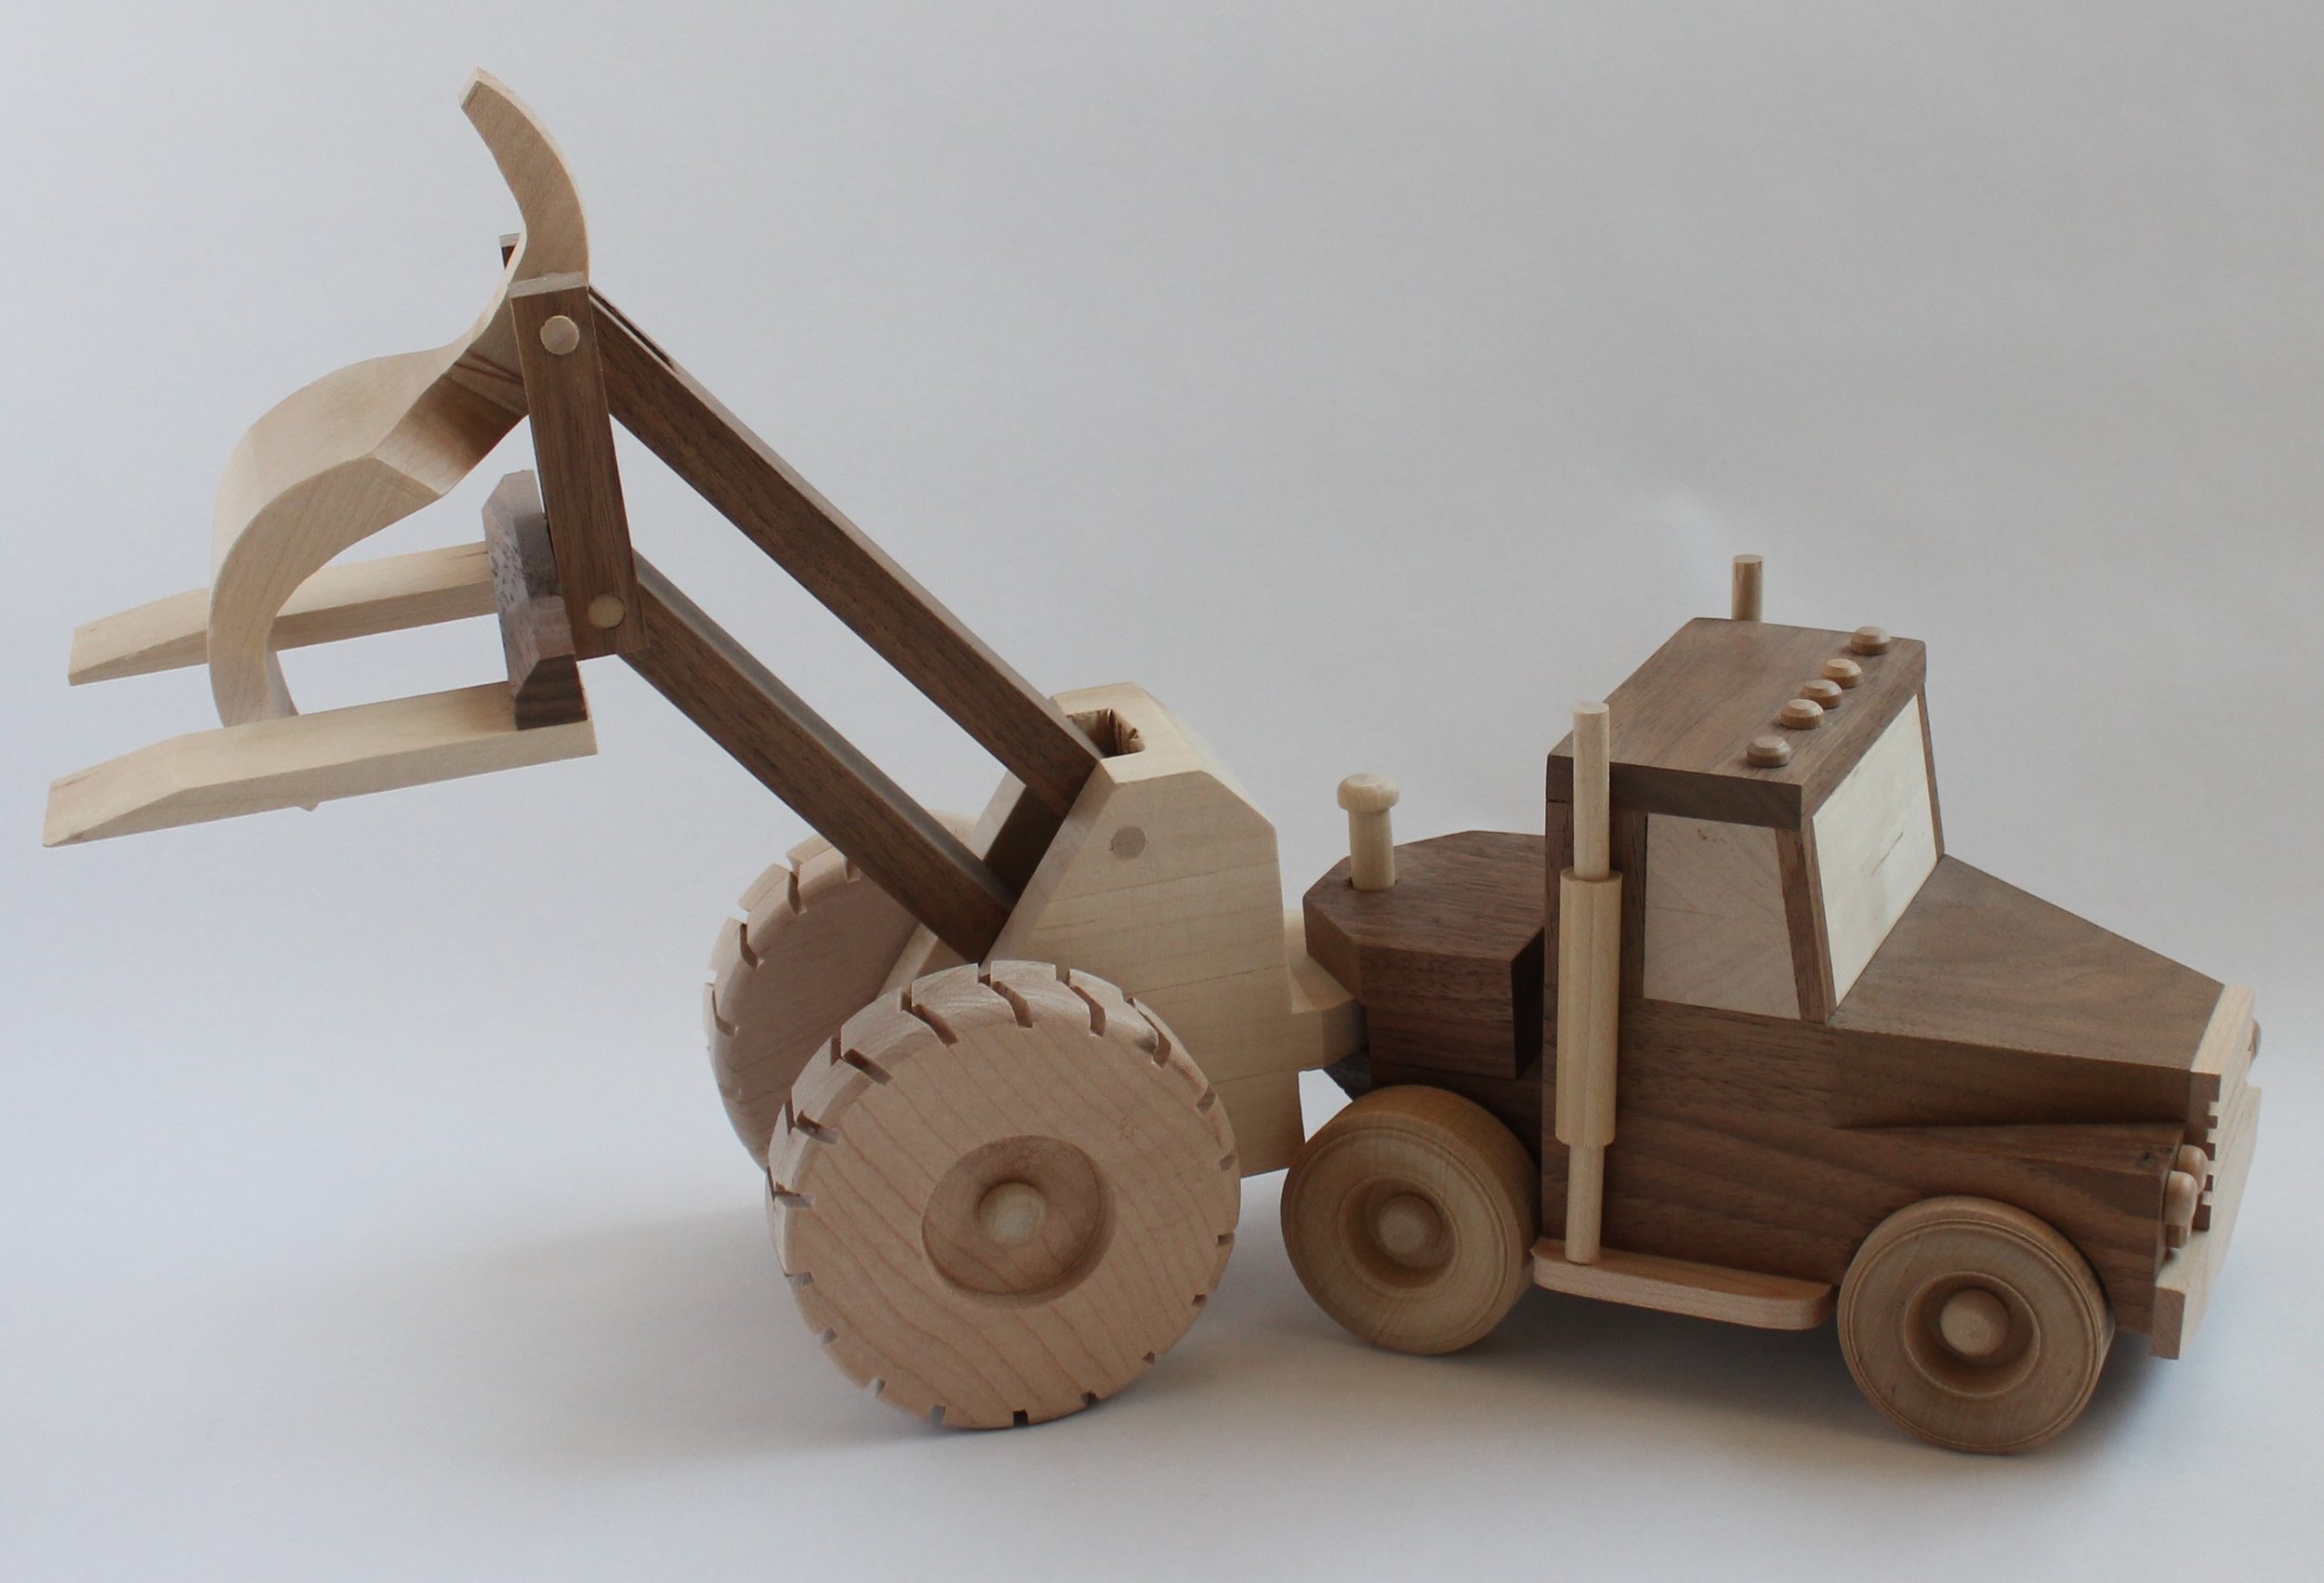
When I first got into woodworking, I started to subscribe to Woodcraft magazine to give me ideas and tricks. Within the first few months of my subscription, there was an article to make a vintage dump truck out of walnut and maple. I thought this was such a cool idea and would be a great gift for nieces and nephews and my grandpa, as he was nearly blind but this would be big enough that he could give me his assessment.
I can’t say I really designed much of this, as there was a very clear plan that I followed. An article a few months later included the front loader design and I ended up buying a book with various truck designs and added in a fork lift attachment. I did experiment with just buying Hobby Lobby wood tires instead of making tires (see different tire designs) as the set up to make the tires is a bit arduous. The logging attachment that goes with the loader is something I came up with so that the design could be modular (with real maple ‘logs’ from our back yard).
I have since made 4 of the dump trucks, 2 of the front loaders, 2 of the fork lift trucks and 1 logging truck based on the original design. I have also scaled the design down to 2/3 and made 1 of each for display purposes on the shelving unit described above.
Memory Box of My Dad
My father passed away in December of 2003 at an age of 54 which was very hard on my family. At the time, there was a pretty good sized elm tree in the front yard of my mom’s house. The following spring, it bloomed just like normal, but when fall came, it didn’t lose its leaves… the leaves stayed on that tree for the next 10 years. My mom liked to say that it was ‘dad’s tree’ and he was making sure we all knew he was keeping watch on us. One of her good friends made a brass plaque for the tree to commemorate my father’s passing. That plaque hung on that tree until an evening when there was a really bad wind storm many years later (not sure how to read into this, but it was also the night my mom got really sick and almost died) and the tree broke off in the center of the trunk. Because of the severity of my mom’s illness, all of my brothers and sisters flew in to be there with her (she made it through luckily) including myself. When I flew back to Colorado, I packed a few of the remaining logs in one of my suitcases (thanks Southwest airlines for 2 bags fly free) and while it wasn’t a huge tree, I did get enough wood milled to make the base frame of the Memory box (the dividers and the front trim were not part of the tree.
I asked all my brothers and sisters to send memories they had of my dad growing up in some physical form so that they could be included in the memory box (since the tree was no longer in the front yard). The plaque was pretty worn and the etching was pretty faded, but I mounted it on a piece of the tree wood and it’s top center. Other notable things include the following:
My dad would read (i.e. make up a different version every time) the muffin munching dragon story to me and my older sister every night… it highlighted princess Rachel (my sister) and prince Russell (me) with yellow and green hair, missing a leg or an eye, and all sorts of other wacky things
My dad could navigate the Chicagoland suburbs by 7-11’s as he was an avid Diet Coke drinker and loved Big Gulps
My dad wasn’t very musical, but he played a mean kazoo
My dad was known for an ‘interesting’ taste in music. When he passed away, his cd changer had a ‘Monster Booty’ cd in it, ‘Battle Calls of the <some Civil War brigade blah blah> Fife Corp’, ‘Best of Robert Palmer’, and a Norah Jones cd to name just a few… the Monster Booty one still just gets me to this day
He was a huge Steve Martin fan… hence the rubber chicken and the ‘Oklahoma’ reference
Kitchen Cabinets
When we moved into our current house, it had the original kitchen cabinets from when it was built in 1983. This included a ‘faux’ butcherblock style countertop (that wasn’t fooling anyone), doors and drawers that were in horrible shape, and just not a lot of storage in general. We put off doing the kitchen remodel until pretty much every other room was updated (we like to say no wall in the inside of the house wasn’t touched)
When looking at the budget for a kitchen remodel, my wife and I were absolutely stunned at how much cabinets cost. On top of that, the craftsmanship of most big box store cabinets was definitely lacking (they looked nice, but particle board is just not my first choice for cabinets.
I looked online and bought a ‘how to’ book on cabinets that got good reviews on Amazon and priced out how much it would be to make cabinets. We wanted to have white cabinets in the kitchen, so could use less expensive solid wood for the faces and the door and drawer fronts. We wanted a wood interior so a nicely finished birch plywood would work out well there. I figured I could build the cabinet carcasses for around $50 a piece and the drawers and doors for about $25 each. The existing base cabinets under the peninsula countertop were in decent shape and just needed a face lift, so I would only need to do drawer fronts and doors. So all in all, I ended up building 2 base cabinets, 5 upper cabinets, a corner upper cabinet, 7 cabinet doors for the existing base cabinets) and 4 drawer fronts (I merged some of the smaller drawers into wider drawers.
So all in all, I think the total out of pocket was around $1000. This was well before prices of wood skyrocketed so it would probably be twice that much today.
End Grain Cutting Boards
So I really like making end grain cutting boards… Edge grain just don’t do it for me. I’m not sure what it is about the end grain exactly that draws me to it - the precision required, the blending of wood species, or the fact that they are just great gifts. Maple, walnut, white oak, purple heart, mahogany, and cherry are some of my favorites.


